Showing posts with label black and white quilt. Show all posts

Friday, 19 September 2014

Scales Cushion Tutorial Part 2

This is the second (and last!) part of the Scales Tutorial. The first part can be found here. Also, have a look at all my Black and White Cushions and the corresponding tutorials!

Still Sewing

Last time, we left off at this stage:

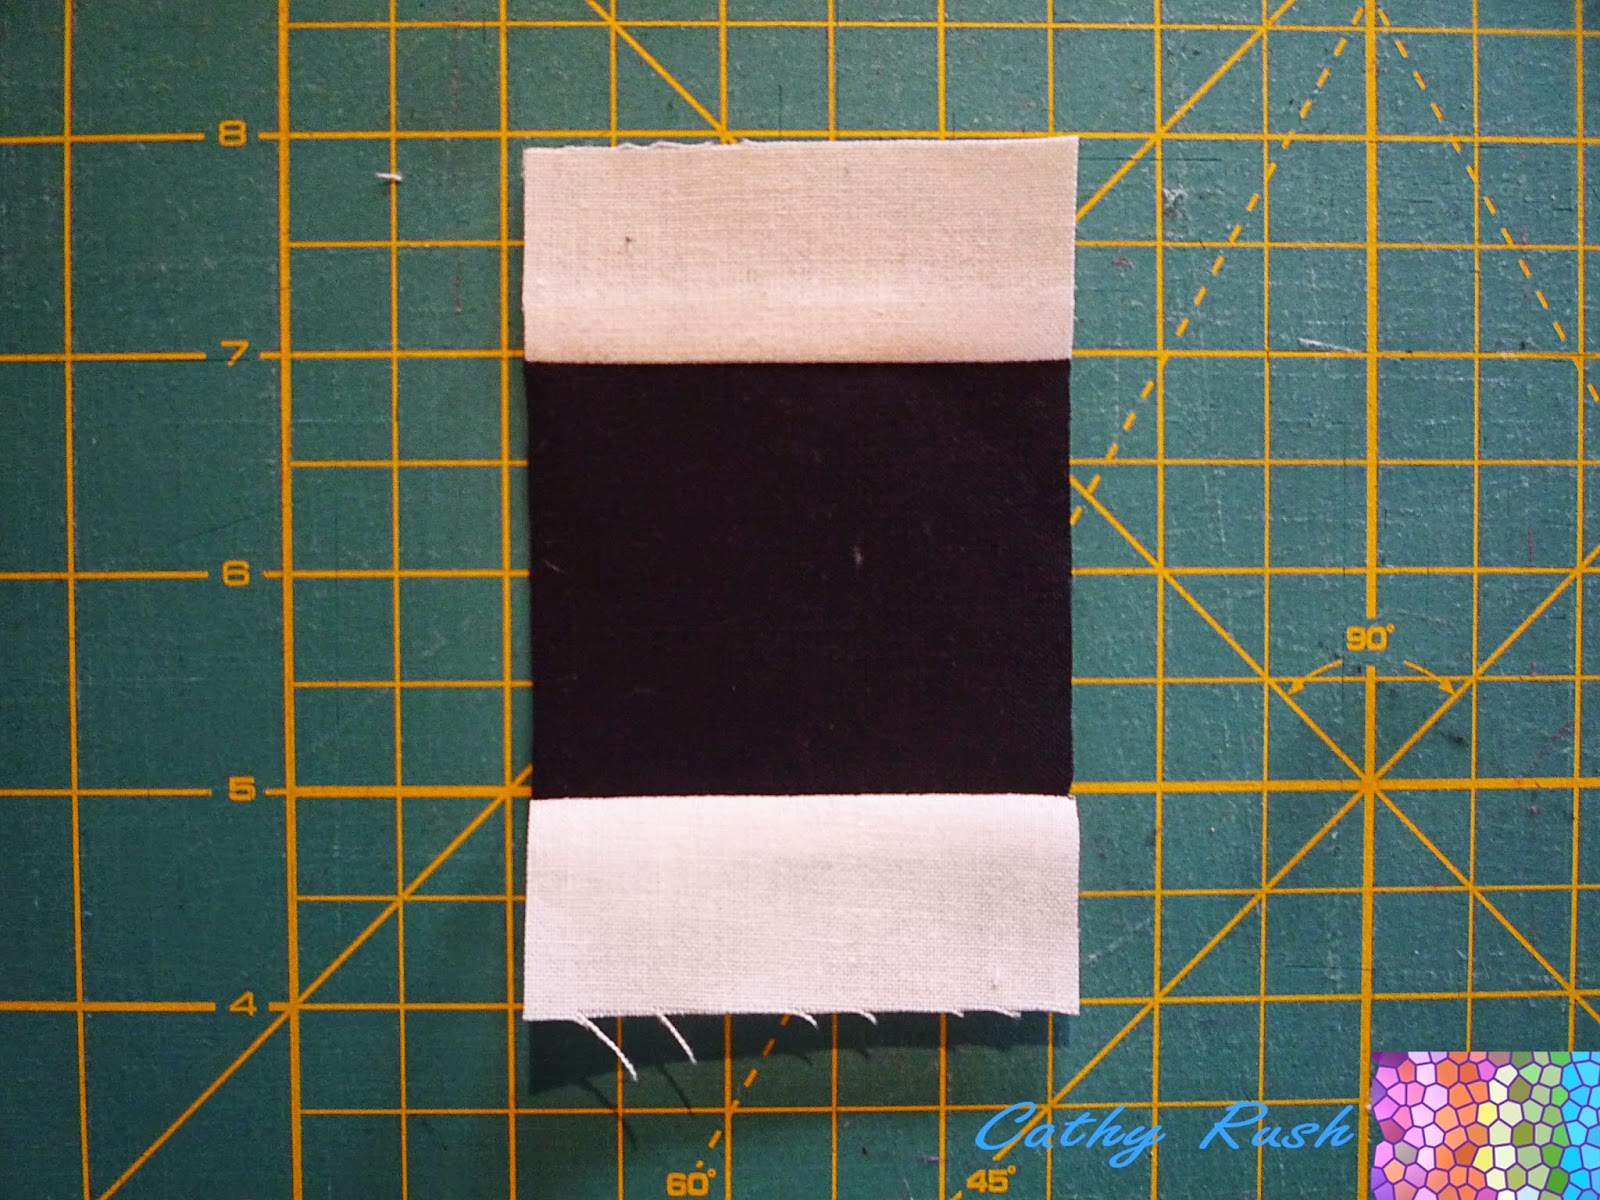
The blocks from Tutorial 1

You've measured them and made sure that they're all about the same size, ideally 11.5". Now divide that measurement by two (5.75") and cut the block into four equal squares. Make sure that the black middle square is about 1" big in all four pieces. Cut the other five blocks as well.

Block cut in 4

Now it's time to add the 1" black sashing strips. Put one of the strips under the pressing foot of your sewing machine, then add one of the small squares underneath this strip. Make sure that the black middle square is to the bottom right. Repeat this for 18 of the blocks, leaving 6 without a sashing strip. Then sew these blocks together, keeping them all in the same direction:

Sashing added between Blocks

You'll need two strips of 6 blocks, two of 4 and two of 2 blocks. Make sure the blocks without the sashing strip are at the end of the strip.

Finished strip sizes, two of each

Now you arrange them (counting the blocks in a strip) 2-4-6-6-4-2 on point. Add sashing between the different strips on the longer side of the two joining strips (blue arrows). On one of the middle strips with 6 blocks you'll have to add a sashing strip on both sides (green arrow).

Where to Add Sashing between the Strips
 
First, sew them together in pairs, then sew the different pairs to one whole piece. You can make sure that the sashing strips align perfectly by marking the connecting points and pinning the two sides together.

Press the seams towards the light, so that the sashing strip lies flat on the back.
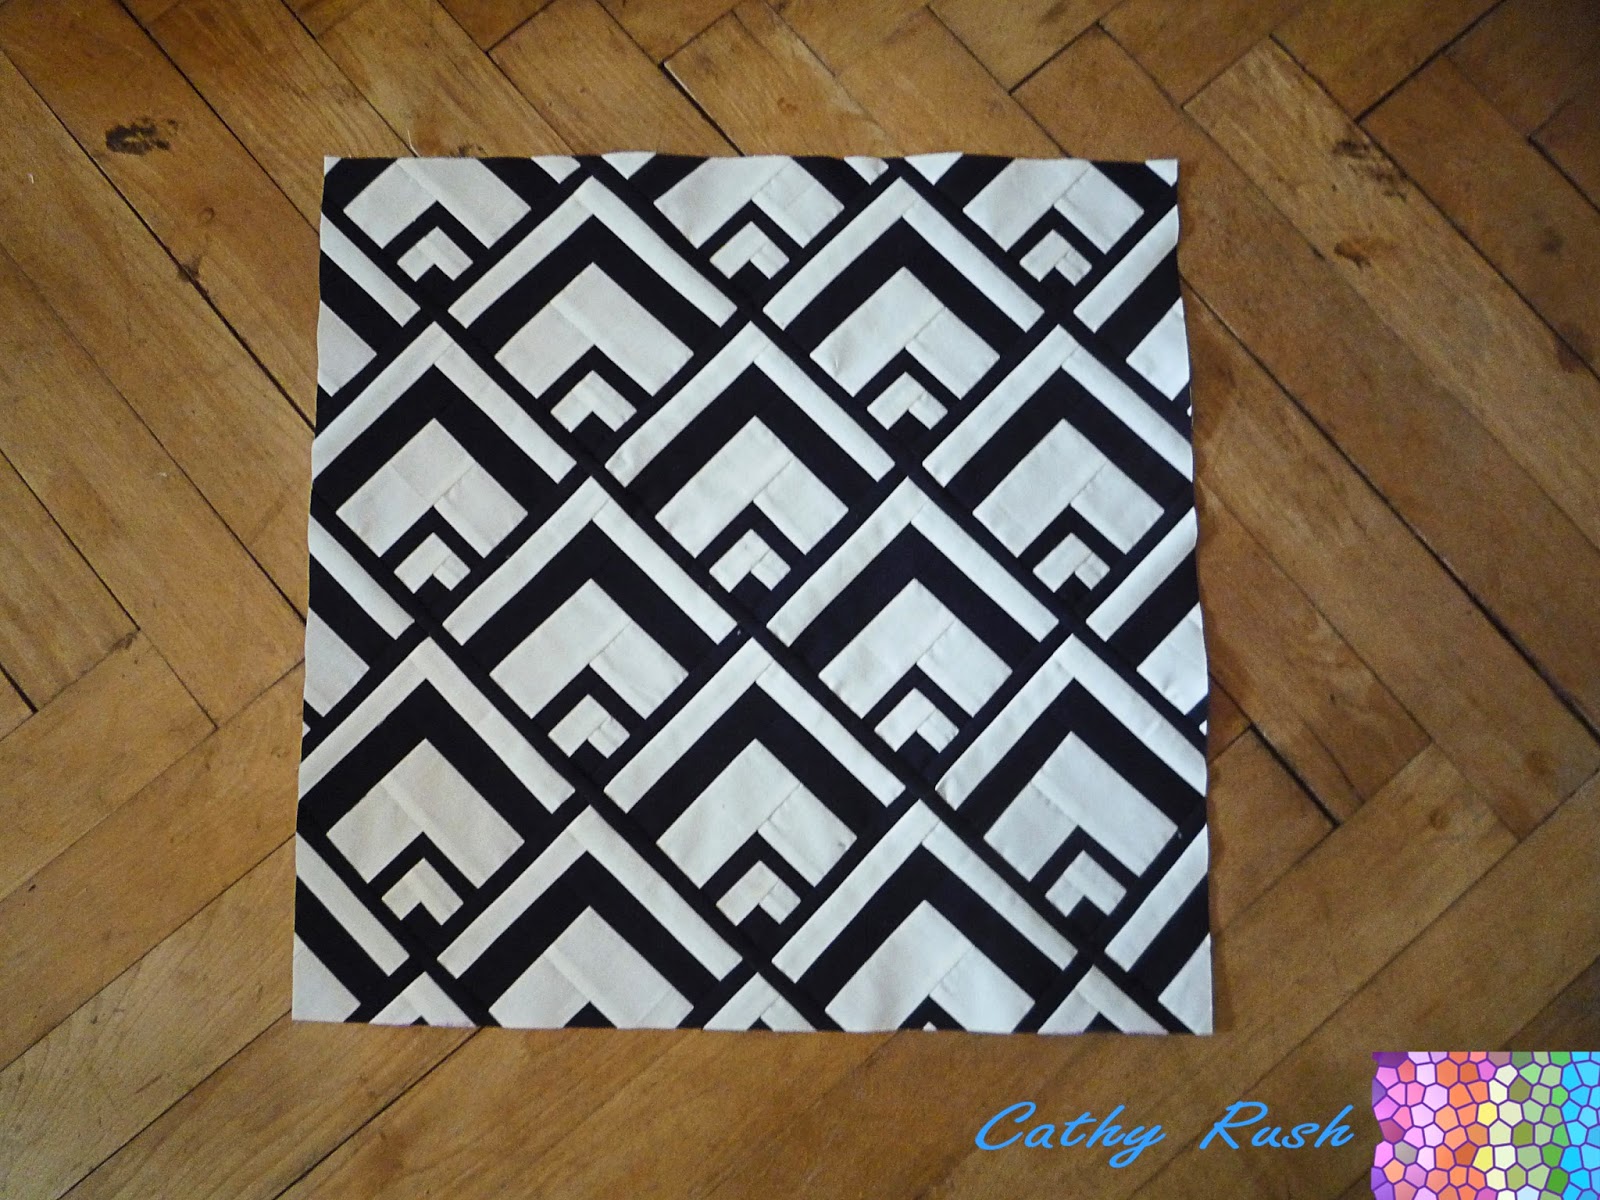
Pieced Top Finished

Now all you have to do is cut the piece to size (20"x20"). I started off by cutting down the left side of the piece (blue line) and then the top (green). Then I measured 20" on the two remaining sides.

Measure at least twice before you cut and make sure you have nice 90° angles. If you misscut, you might have to start from the beginning again! (No pressure! *lol*)

Cutting Down to Size

And this is how the 20"x20" piece looks like:

Cushion Top Finished

Now you can add a batting of your choice and "quilt it as desired". I kept it simple and just SITD along both sides of the sashing to attach it to the batting.

For the back of the cushion cut two pieces the  20"x26". Press them in half (20"x13") and topstitch along the folded line about 1/4" in. Lie the two pieces on top of the quilted Scales piece, so that they overlap in the middle. Stitch along the the outside (also with a 1/4" seam allowance). You might want to go back over and secure the corners and especially the overlap of the two back pieces, as these are the stress points.

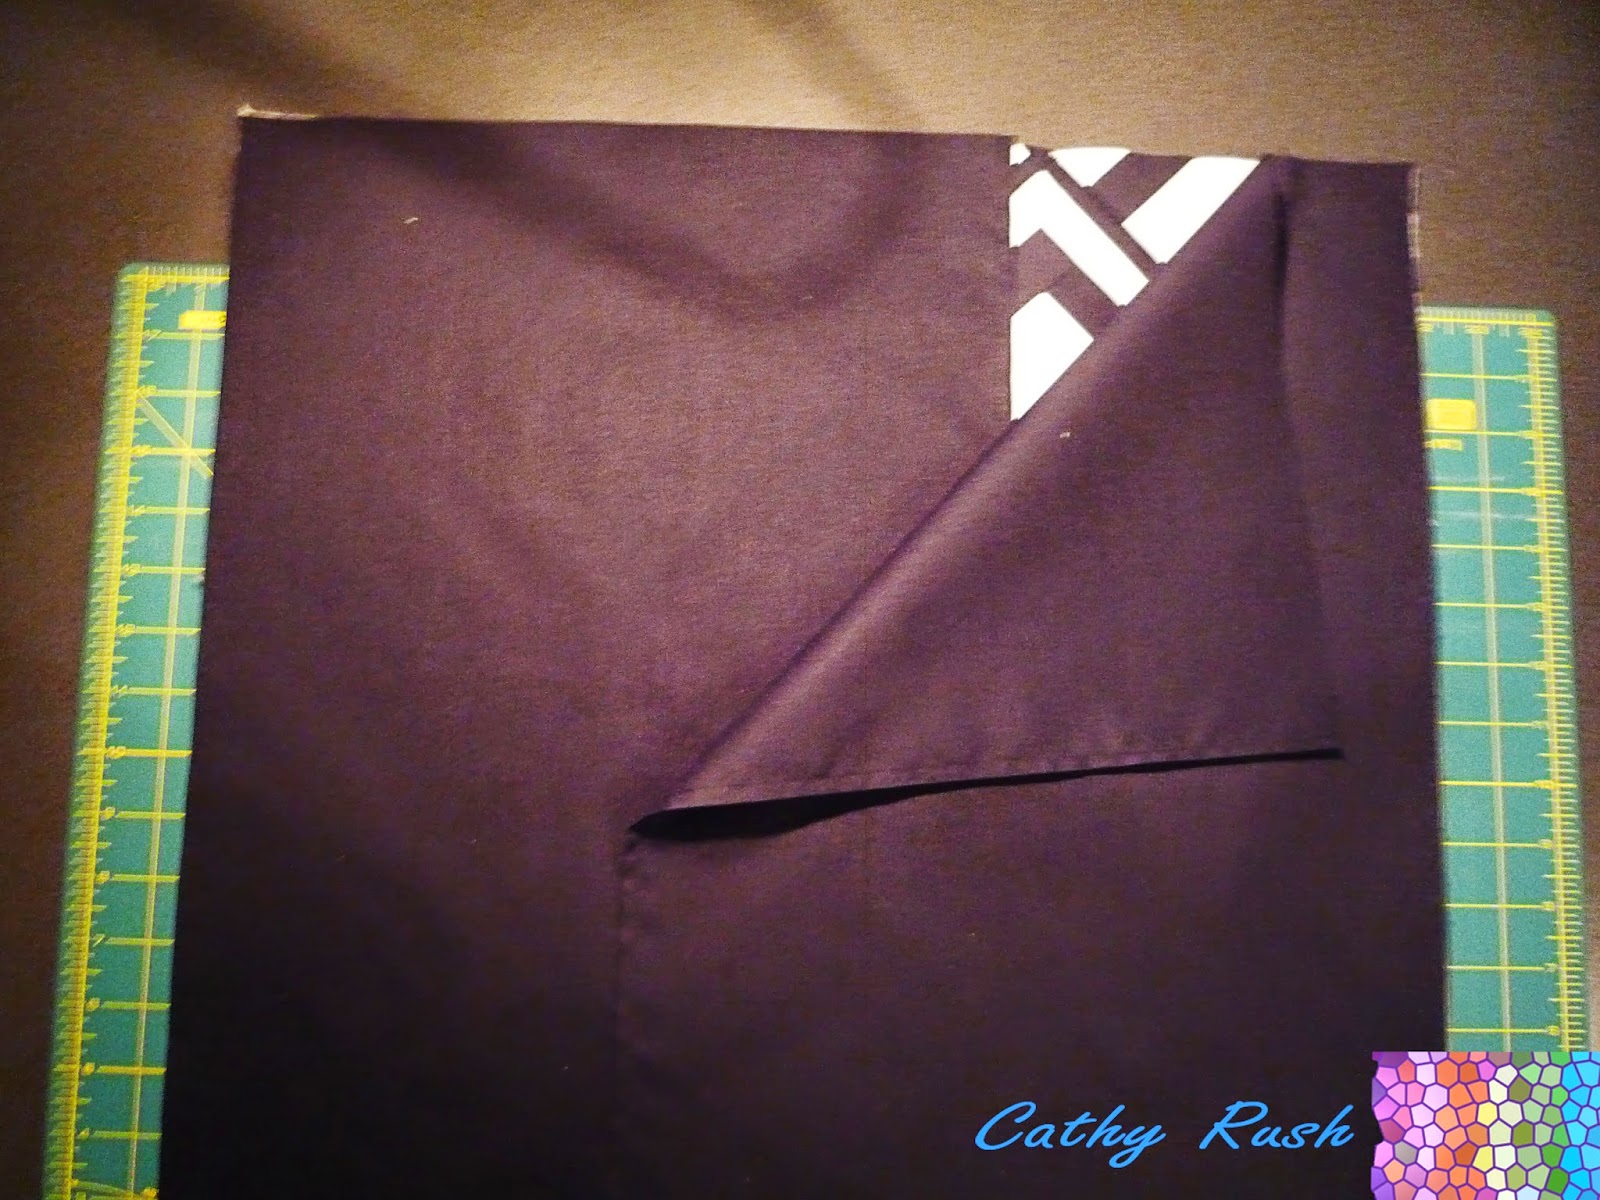
Adding the Back of the Case

Turn it inside out and put a cushion in it and voilĂ , here is your finished pillow:

Finished Scales Cushion


Have fun recreating the same or similar pillow cover! And make sure to share it with me!


All the best,
Cat.


Friday, 5 September 2014

Scales Cushion Tutorial Part 1

Hi there!

Today I'm showing you how I made the Scales cushion case. Here you'll find links to the other tutorials for the cushions.


Fabrics Needed

As with all the cushions in this series, the fabrics you need are black and white. Of course you can use other solids as well, even small prints might work for you.

Cutting...

Cut the following pieces (from top to bottom):


Fabrics needed for Scales Cushion


(6) 2.5" squares in black
(3) 1.25" strips in white
(4) 1" strips in black
(5) 2" strips in white
(6) 1.5" strips in black
(6) 1.25" strips in white
plus (8) 1" strips in black for sashing (not in the picture)

I calculated these measurements for normal 42"-44" wide fabrics, as I worked with wide fabrics when I made this cushion.

...and Sewing

First, take one of the white 1.25" strips and put it under your presser foot. Then take one of the black 2.5" squares and lay it right sides together on the bottom of the strip (as you are working with solids, there basically is no right side). Now you can sew the two pieces together and when you get to the end of the black square, just add the next one with a little gap between them, as is shown here:

"Chain"-piecing the squares

Once you've chain-pieced all six squares, cut them off the strip between the little gap, turn them around and add a white strip on the opposite side as well. Make sure you place them the right sides together underneath the strip! Again sew the strip to all six squares, then cut them loose. Press the strip with the seams outwards and cut back the white strips on the edge if necessary. It doesn't matter if you use scissors or a rotary cutter for that. However, I prefer to use a ruler and rotary cutter, especially if the strips are a bit wider.

This is how your "square" should look like by now:

Squares with two sides added

Now that you come this far, it's basically all boring, boring repetition!

Again, place a white 1.25" strip underneath your presser foot, put the "squares" underneath it and sew on one side of the as of yet black sides, cut them loose, repeat on the other side, then press both strips outwards. Your block should now look like this:

First Round Done

Now take a 1" strip in black and sew it on two sides of the block. Press the seams outwards:

Second Round Halfway Done

Now sew the 1" black strip to the other two sides, again press the seams outwards.

Second Round Done

Proceed by taking the 2" white strips and sew them to the block on two opposite sides, cut them off, press the seams outwards.

Third Round Halfway Done

Add the 2" strips on the other sides as well, pressing the seams outwards.

Third Round Done

Can you guess what you'll have to do next??

Right, take the 1.5" black strips and sew them to two opposite sides of the block, press the seams outwards.¨

Fourth Round Halfway Done

Now of course do the same to the other two sides.

Fourth Round Done

For the last time, take a 1.25" white strip and add it to two opposite sides and press the seams outwards.

Fifth Round Halfway Done

Repeat on the other two sides, cut them off and press the seams outwards.

Now you should have six blocks that look like this:

Finished (?!) Block

Now measure your blocks. They should be around 11.5". Mine were a bit smaller, because I use a 1/4" presser foot with guide and as I can't move my needle (yeah, it's a very basic model, I've been saving up for a new one for a while) my seams are a bit fat. However, as long as they are consistent and you're only sewing for yourself, that's not a problem!

In the next tutorial, you'll learn how to turn these blocks into this cushion:

Finished Scales Cushion


All the best,
Cat.

Friday, 22 August 2014

Seeing Everything in Black And White - Or My New Cushions

As I have blogged recently, I was working on beautifying my living room / bar / dining room / sewing room (talk about multi-purpose!^ ^). Today, I'm showing you the result.


My couch went from this....

Sad little pre-transformation couch


...to this:
 
Hm, I think we need a bigger couch to fit all the cushions!

This whole room is actually all furnished in black and white.  It wasn't really planned, but once we moved in together with all our random furniture pieces, it just turned out that way. We decided to just go with the flow and have added a few black and white pieces since.

The advantage of a black and white living room is that you can easily pimp it up: Add a few candles and cushions in one colour scheme and it's a different room. Hang up colourful pictures, posters or paintings, and the room is transformed. That's what I've been doing so far. Whenever the mood struck (I call it "spring fever"), I bought a few new candles, a cushion or two and voilĂ : a new room!

This time I decided to simply keep it black and white. I experimented with a few other colours (mainly red), but simply didn't like the look. I'll probably pimp it up with one or two colourful cushions once spring fever gets to me again and wham! I'll have a new look!

I plan to post the tutorials for the cushions bit by bit on here, so you can recreate them if you want to.


Here are the links to the tutorials:


Tutorial soon to come


Tutorial soon to come!


The only problem I have now: I have so many ideas for more black and white pillows (no, cushions, right? I think I was told that pillows are for the head and cushions for the... uhm, lumbar region?) that I'm running out of space on my couch. I think I need to get a bigger couch...but then I'd need a bigger living room, so basically I'd need a bigger flat, for that I'd need more money, to get more money I'd need another job and...yeah, you see my problem here?!

As always, I'd love to hear your thoughts/questions, so leave a comment (it's open to everybody!).

All the best,
Cat.

Tuesday, 19 August 2014

Cushion Tutorial: Black and White Rectangles

Hi there!

Today I'm sharing with you a little tutorial for a cushion cover with rectangles. You could of course also enlarge it for a whole quilt if you wanted.

What inspired me to make this was actually a wallpaper I saw somewhere.


Fabrics Needed

You'll need two different fabrics. I used black and white, but of course you can use whichever two solids you like - or even prints (best would be small prints, as the pieces are too small to see bigger designs).

Cutting and Sewing

Cut 3" strips from both fabrics, then cut them up into 3" squares. It depends on the size of the pillow you need to cover, mine was 50cm x 50cm (20" x 20"), so the instructions are for that size. But you can easily adapt them for your own pillow.

You'll need about 4 strips per colour, which yields at least 50 3" squares (or 100 total).


Lay at least one black and one white square on top of each other (I did it with 2 each, it gets too tough with more than 4 layers for me). Mark the white square both on the top left and the bottom right one inch from the corner (example on the left in picture). Then place your ruler on both those dots and cut the squares in half. If you're using one sided fabric then you need to cut 22 of each fabric as mirror image (example on the right). If you're using solids or any other fabric that looks the same on both side, you can just flip them whichever way you need them to be!


Now lay out your cut pieces by exchanging one side with the opposing colour. You'll need 55 blocks like the one on top and 44 of the one on the bottom.


 To sew them together, pick the two pieces up and overlap them slightly:


I actually eyeballed it, but you can also measure them. Of course, that'll take quiet some time, after all, you're making 99 blocks!

To help you with eyeballing it, here's my tipp: Your needle/seam should go into the angle where the two pieces meet (red line), which should be 1/4" from the straight edge of the two fabrics (blue line).


You can chain piece them all, but make sure you make two different piles for the two different blocks. This makes assembly far easier! Press all seams to the dark side.

Now take one block from each pile and sew them together. Make sure the colours are always opposing. They should nest nicely, so no pinning is needed!


After sewing them all into twos, you should have eleven left from one type of the blocks. Sew them to eleven sets of two.

(For the cushion, I actually sewed them together the other way around,
starting with them bottom ones, see below!)


It's best if you lay out all the columns so that you don't mix them up! Add two sets of twos to another, making sets of four, add them to another set of four, add to each one of the sets of three (Sorry, I forgot to take pictures of that whole procedure).

Remember, you'll need 11 identical columns with 9 blocks each. All of them have to start with the type of block you made 11 more. For example, I always told myself "small black top left corner" as a reminder that I had to start all my columns (and therefore also all sets of two, etc.) with a block that looked like this:


Once you've finished your eleven strips of nine, take them to your ironing board. Press the seams in 5 of the strips towards the top, and the seams in the other 4 strips to the bottom. Make sure they don't bend and stay as straight as possible.

Take a strip each and sew them together. The seams should nest, as the seams go in opposite directions. Repeat 3 times. There's one strip left over. Now add the strip sets of two to another strip set, etc.

You'll end up with a rectangular shape. Cut back all sides symmetrically so that you end up with a square shape:


I added a cotton batting to the back and did some SITD, but, again, that was basically just to attach it, not to add structure. The backing was added as described in a previous post, with two pieces cut 20" x 26".

And that's how it looks like finished:


Front of the Rectangle Cushion


Back of the Rectangle Cushion


I hope the explanations are clear. If not, feel free to ask! :)


All the best,
Cat